
Kitchen Renovation: Prepping and Painting the Cabinets
You’ve likely seen pictures of our kitchen renovation on Instagram. To follow along, just check out the hashtag #diylikeachampion on Instagram. This is Part 2 of our renovation series. You can find Part 1, the timeline and demo process, here. Today’s post is all about how we (properly!) prepped and painted our kitchen cabinets.
When we bought our house almost exactly two years ago, the kitchen cabinets were the first thing I wanted to paint. However, with less than three months to go before Clara arrived, we had more pressing home projects to work on – her nursery being the main one. Like I mentioned in the first renovation post, we had plans to work on the cabinets sometime in the spring after Clara was born, but it didn’t happen. Best laid plans and all.
I’m happy to say the cabinets are now all but finished. The hardware I ordered is on backorder for a couple weeks, so we’re still waiting on that before we check off the cabinets from our long DIY to-do list. Cabinet painting was an entirely new project for us to conquer, and I’d be lying if I said we weren’t nervous going into it. I spent so much time reading about it beforehand that I’d psyched myself out pretty badly. Ultimately, though, the whole experience wasn’t all that complicated.
Prepping the cabinets was the most time consuming part of the painting process. It was also the filthiest. I cleaned the cabinets when we moved in, but there was still quite a bit of buildup on the hinges and tops of the upper cabinets. Prep work is the most important part, and we took our time to ensure things were done right. Shortcuts are great, but not if they risk sacrificing the final product.
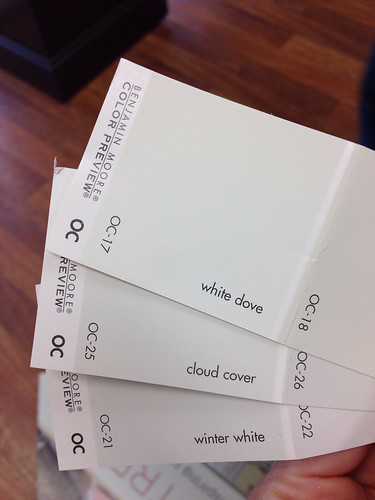
Who knew there were so many options for white paint?
After a lot of research, I finally decided on Benjamin Moore Advance paint in Cloud Cover. It’s similar to an oil-based paint in that it is supposed to hold up to wear, but it lacks the oil-based problems like yellowing and odor. It’s also low-VOC and easier to clean up. This type of paint doesn’t require a top coat, which was another big selling point for me. It’s a self-leveling paint, and we got amazing coverage with it. This paint has a longer dry time than others, but it was worth it because the result was an insanely smooth finish.
For painting, we used a high volume low pressure sprayer that we bought refurbished. I can’t say enough good things about it, and it made the painting process go much faster than I expected. I knew there would be a learning curve, so we tested it out on some spare drywall pieces before starting with the cabinets. If you’re thinking of painting your cabinets, an HVLP sprayer is a worthwhile investment, especially if you can find a refurbished or used one.
We didn’t work on the cabinets nonstop because we were working on the weekends and at night after Clara went to bed. It took us longer than I would have liked from start to finish, but I think we still did well considering the amount of time we had to work on it. Here’s a rough timeline of how the cabinet painting process went down:
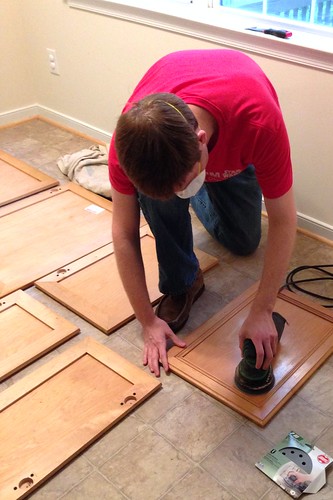
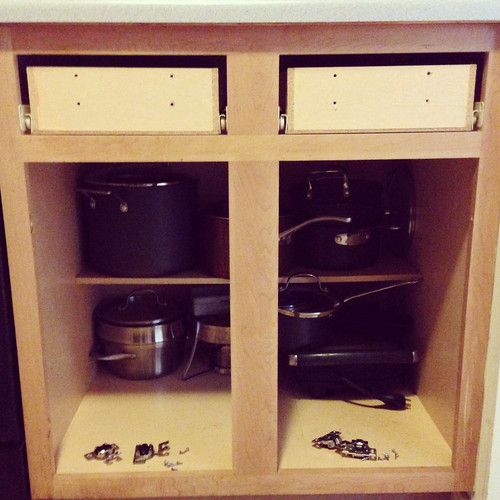
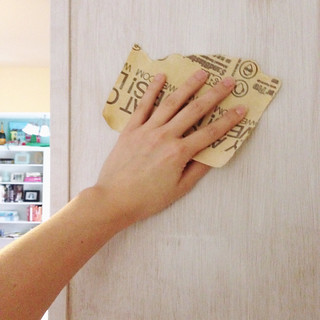
Day 1: Remove the cabinet doors, drawer fronts and hinges. We used an orbital sander to sand and remove most of the gunk from the fronts and backs of the doors and used sandpaper for the sides and grooves. If needed, this would be the time to fill any holes with wood putty. Since our cabinets didn’t have any hardware, we didn’t have any holes like that to fill, but we did have to fill a couple dings. The wood putty dries pretty quickly and can be sanded as soon as it’s dry. We also removed everything from the cabinets and sanded the frames by hand. Once everything was sanded, we used a liquid deglosser/degreaser to clean off the dust and prep the surface for priming.

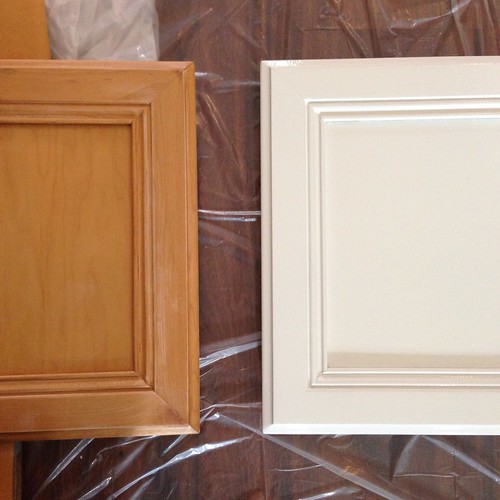
This is how the cabinet doors looked after the primer. If you look closely, you can see where I wrote initials in the hinge cutouts so that we’d know where each cabinet belonged.
Day 2: This was priming day. We used Zinnser Cover Stain, and I highly recommend it for priming. We used it on Clara’s dresser makeover (see a picture here) and highly recommend it. We put a drop cloth in the eat-in area of the kitchen and placed all the cabinets there. We used cardboard packaging pieces from our recent bar purchase to elevate the cabinet doors and drawers so that we could easily prime around the sides. The primer has to dry between coats, so we were only able to do one side at a time. We also primed the cabinet frames after Clara went to bed. We used a high quality, 2-inch angled brush to prime and applied the primer in a nice, even coat.
Day 3: Flipped the cabinets and primed the other side.
Day 4: (Or once your primer is totally dry) We sanded everything again, just to make sure we had a smooth surface for the paint. Once everything was sanded, we used a tack cloth to remove the dust prior to painting. We used a high quality, 2-inch angled brush to paint the frames and used the sprayer on the cabinet doors and drawer fronts. We started with the backs, just in case we messed up. The paint dries to the touch in 4-6 hours, but we only painted one side a day to ensure that we didn’t mess up the other side. It’s 16 hours to recoat, so this gave us time to get the first coat on the other side before moving on.
Day 5: Paint the first coat on the fronts of the cabinets and the second coat on the cabinet frames.
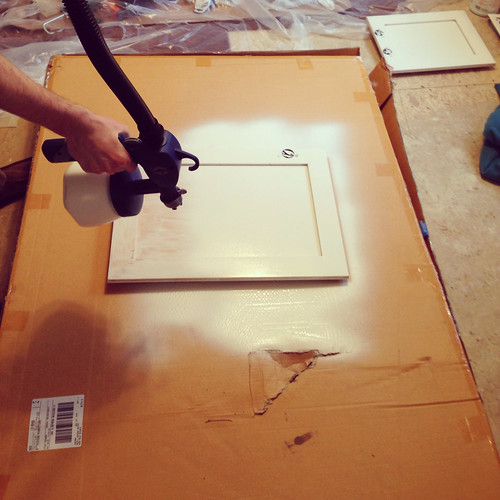
We didn’t have a table for painting, but this big box ended up working just fine. We elevated each door and set up an assembly line. As Eric was putting a painted cabinet down to dry, I was getting the next one in place to be painted.
Day 6: Sand any paint drips, as necessary. Paint the second coat on the backs.
Day 7: Second coat of paint on the front.
Day 8: Third coat of paint on the front. We had a few uneven spots (that probably wouldn’t have been noticeable to anyone else, but…), so we decided to do an extra coat on the fronts of the cabinet doors and drawers.
Day 9: Wait on the cabinets to cure. We also tossed the hinges in a bucket of hot, soapy water to help clean them off. Now that they’re clean, they look good enough to match the newness of the cabinets.
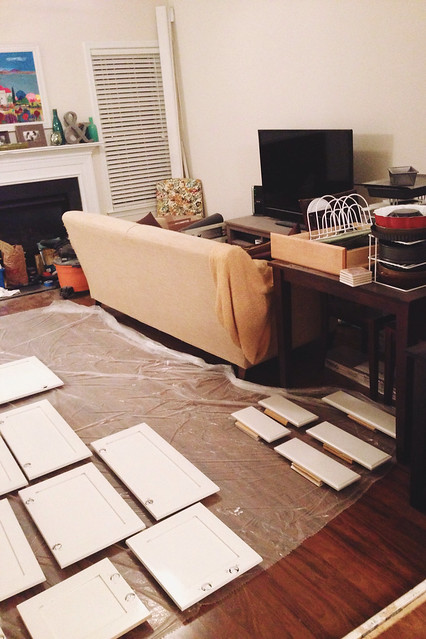
This is indicative of how our living room looked while we were painting the cabinets.
After a 5 day curing period, the cabinets are ready to be rehung. I can’t tell you guys how happy I am to have them off the living room floor and back where they belong. I’ll be even more excited when the hardware arrives. It’s been a long process, but I know the end product is going to be phenomenal. Also, we saved a ton of money by doing it ourselves. There’s no way we could’ve gotten new cabinets for the cost of refreshing our current ones. For anyone interested, here’s an estimated cost breakdown:
Zinnser Cover Stain: $7 at Richmond ReStore
Benjamin Moore Advance Paint in Cloud Cover: $52
Ella Hardware from Pottery Barn: $163 with a coupon. This was our biggest splurge, obviously, but I thought our spiffy new cabinets deserved some bling.
Refurbished HVLP Sprayer: about $90
Sandpaper, brushes, gloves, masks, drop cloths, etc.: Less than $20 because we already had a lot of this on hand.
The end is finally in sight, and we’re going to have a (mostly) done kitchen by Christmas! We’re hoping to paint the walls before sharing the final before and after shots with all of you, and I’m already excited thinking about how different our kitchen is going to look when it’s all over.
They look phenomenal Courtney! I will definitely be referring back to this post when we finally do ours. Can’t wait to see the final reveal!
They look phenomenal Courtney! I will definitely be referring back to this post when we finally do ours. Can’t wait to see the final reveal!
Courtney – Thank you so much for this great post! We are looking to do this very same thing to our cabinets over Christmas break. Can you post some pictures of your whole kitchen so I can see how great it looks?
I will definitely post pictures when it’s finished. We just started rehanging the cabinet doors last night, and we’ve got a couple more things to complete before we share the whole kitchen. Honestly, it’s still pretty messy while we clean the dust out of the cabinets and get the dishes back where they belong.
Courtney – Thank you so much for this great post! We are looking to do this very same thing to our cabinets over Christmas break. Can you post some pictures of your whole kitchen so I can see how great it looks?
Did you run the primer through the sprayer? I have a sprayer but I’ve read a few scary things about certain kinds of paint/primers not running through a sprayer well. I’d love to know how it went for you!
We didn’t, mostly for the same reasons. I didn’t want to risk messing it up when what we really needed it for was the paint. It worked perfectly on the paint, though. All we had to do (per the instructions with the sprayer) was thin it slightly with water. I never imagined what a smooth coat we’d get, and I sort of wanted to spray everything after that hahaha.
Im so impressed, I love white kitchens. I don’t think I would have the patience to do it so neatly. I have to admit I would have liked some step by step guidance like on: https://mykukun.com/how-to-paint-kitchen-cabinets-5-easy-steps/
Hello, I am so glad I came across this because I am debating on cloud cover and Dove wing.. wondering if you have more picture? Thanks!!
We still have Cloud Cover. I love it in natural light, but it looks warmer when only my overhead kitchen light is on. I still think it’s a fantastic white, not too bright and not too creamy, but I may have gone a tinge brighter since there’s not a lot of natural light in my kitchen.